The campaign builder is where you’ll be setting up your automated sequences in Wingsend. Campaigns are central to creating a quality automated experience for users and an effective one for your marketing purposes. You’ll typically be sending a marketing message in response to an action taken by your user, or predefined time interval. The purpose of this article is to give an overview of the various types of campaigns and a few use cases for the campaign builder.
Contact Sources
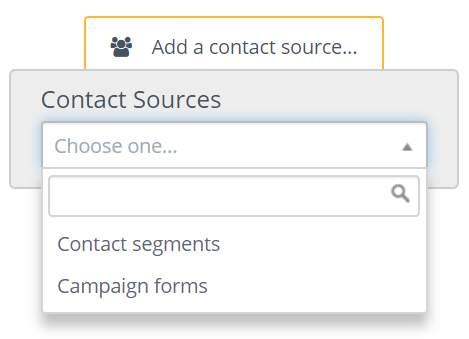
The beginning of each campaign will start with choosing who it applies to–the contact segment you’re targeting. You can either choose Contact Segments or Campaign Forms, or both.

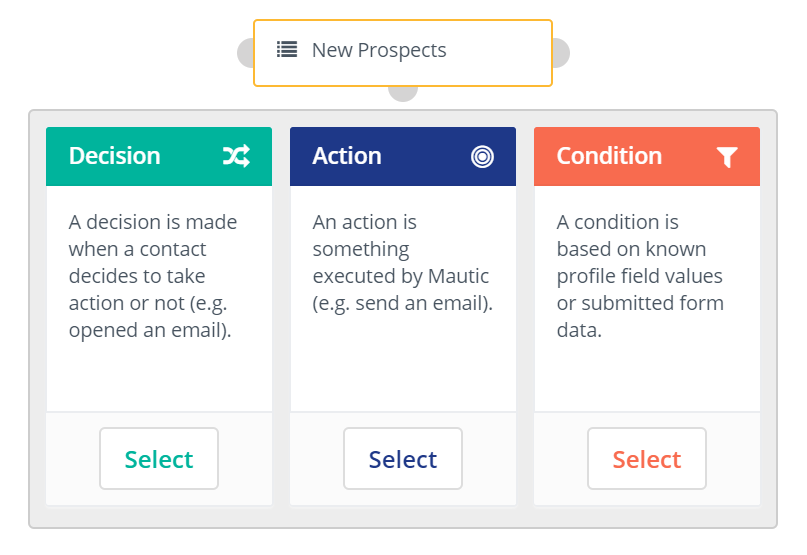
After selecting your source(s), the next step is to add a decision, action, or condition.

Decision
Decision let’s you take action based on whether or not the contact meets certain criteria. For example, if the user hasn’t opened an email in 45 days you may want to move them to a ‘low-engagement’ contact segment, and market differently to them. If they have been opening your emails, you may want to send them information about a new product you’re testing.
Decisions can be based off of whether or not the contact has:
- Downloaded an asset
- Submitted a form
- Visited a page
- Opened an email
- Requested dynamic content
Action
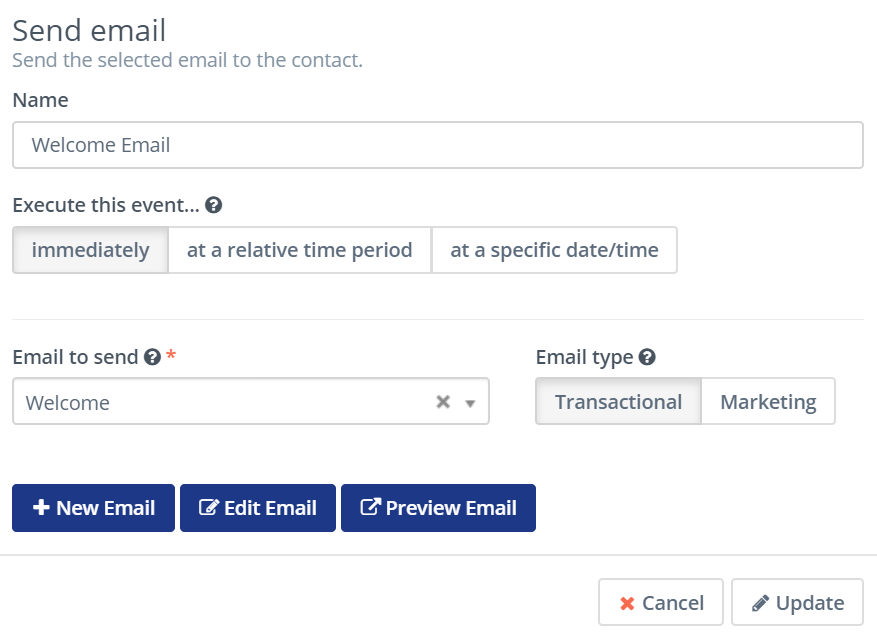
Campaign actions are going to be your bread and butter for automating. Want to send a welcome email? That’s gonna be an action, as well as all of the other emails you send.
You may have a decision or condition preceding the action that informs the action that’s taken, but actions are where you send your messages.

Actions you can take are:
- Add to company’s score
- Add contact to company
- Adjust contact’s points
- Change campaigns
- Change contact’s stage
- Delete contact
- Jump to event
- Modify contact’s segments
- Modify contact’s tags
- Push contact to integration
- Push dynamic content
- Send a webhook
- Send email to user
- Send marketing message
- Show focus item
- Update contact
- Update contact’s primary company
Conditions
Conditions are useful when you want to be more precise with tailoring your messaging to your users. For example, you may want to set a condition that if the contact has opted into sms marketing to prefer that channel of communication. If the contact doesn’t have a phone number but has an email, you can have the same messages go out via email.
There are two types of conditions: Conditions based on Contact Field Value and Conditions based on Form Field Value.
Decision Tree Workflows

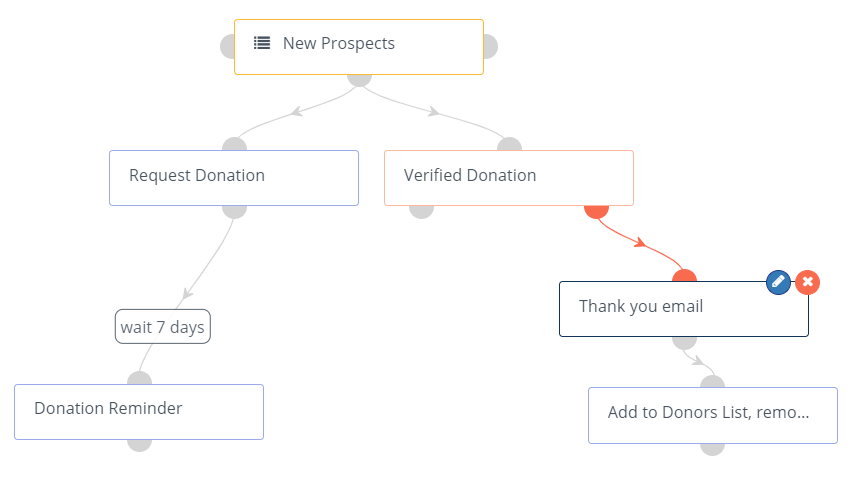
If you’re new to automation workflows, you’ll be seeing more of these. Automation is predicated on the fact that we can predict the appropriate response given that we know the actions being taken. In the example shown above, all new prospects are sent an email titled ‘Request Donation’ and when a donation is made, they’re removed from the ‘New Prospects’ list and added to the Donor list.
The donor’s list would be receiving entirely different marketing messages so this campaign only applies to leads who haven’t made a donation yet.
You can see there’s a followup email ‘Donation Reminder’ that happens if the initial email wasn’t met with decisive action. It’s set to wait 7 days after the first email is sent (which would be relative to when the contact joined the ‘New Prospects’ list).
Conclusion
These are just the fundamentals of automating using the campaign builder. Depending on the intricacy of your needs and the amount of integrations you’re using, the process can become infinitely more complex.
In a way, that’s the beauty of automation with Wingsend–you can keep it simple with a drip-campaign of emails being sent out once a week, or have insanely complex chains of decisions and conditions followed by actions. It’s up to you to create a marketing sequence that works for your company. Cheers and good luck!